Easy Hexagon Cardigan

A beginner friendly pattern that adapts to any yarn, any style, and any season.
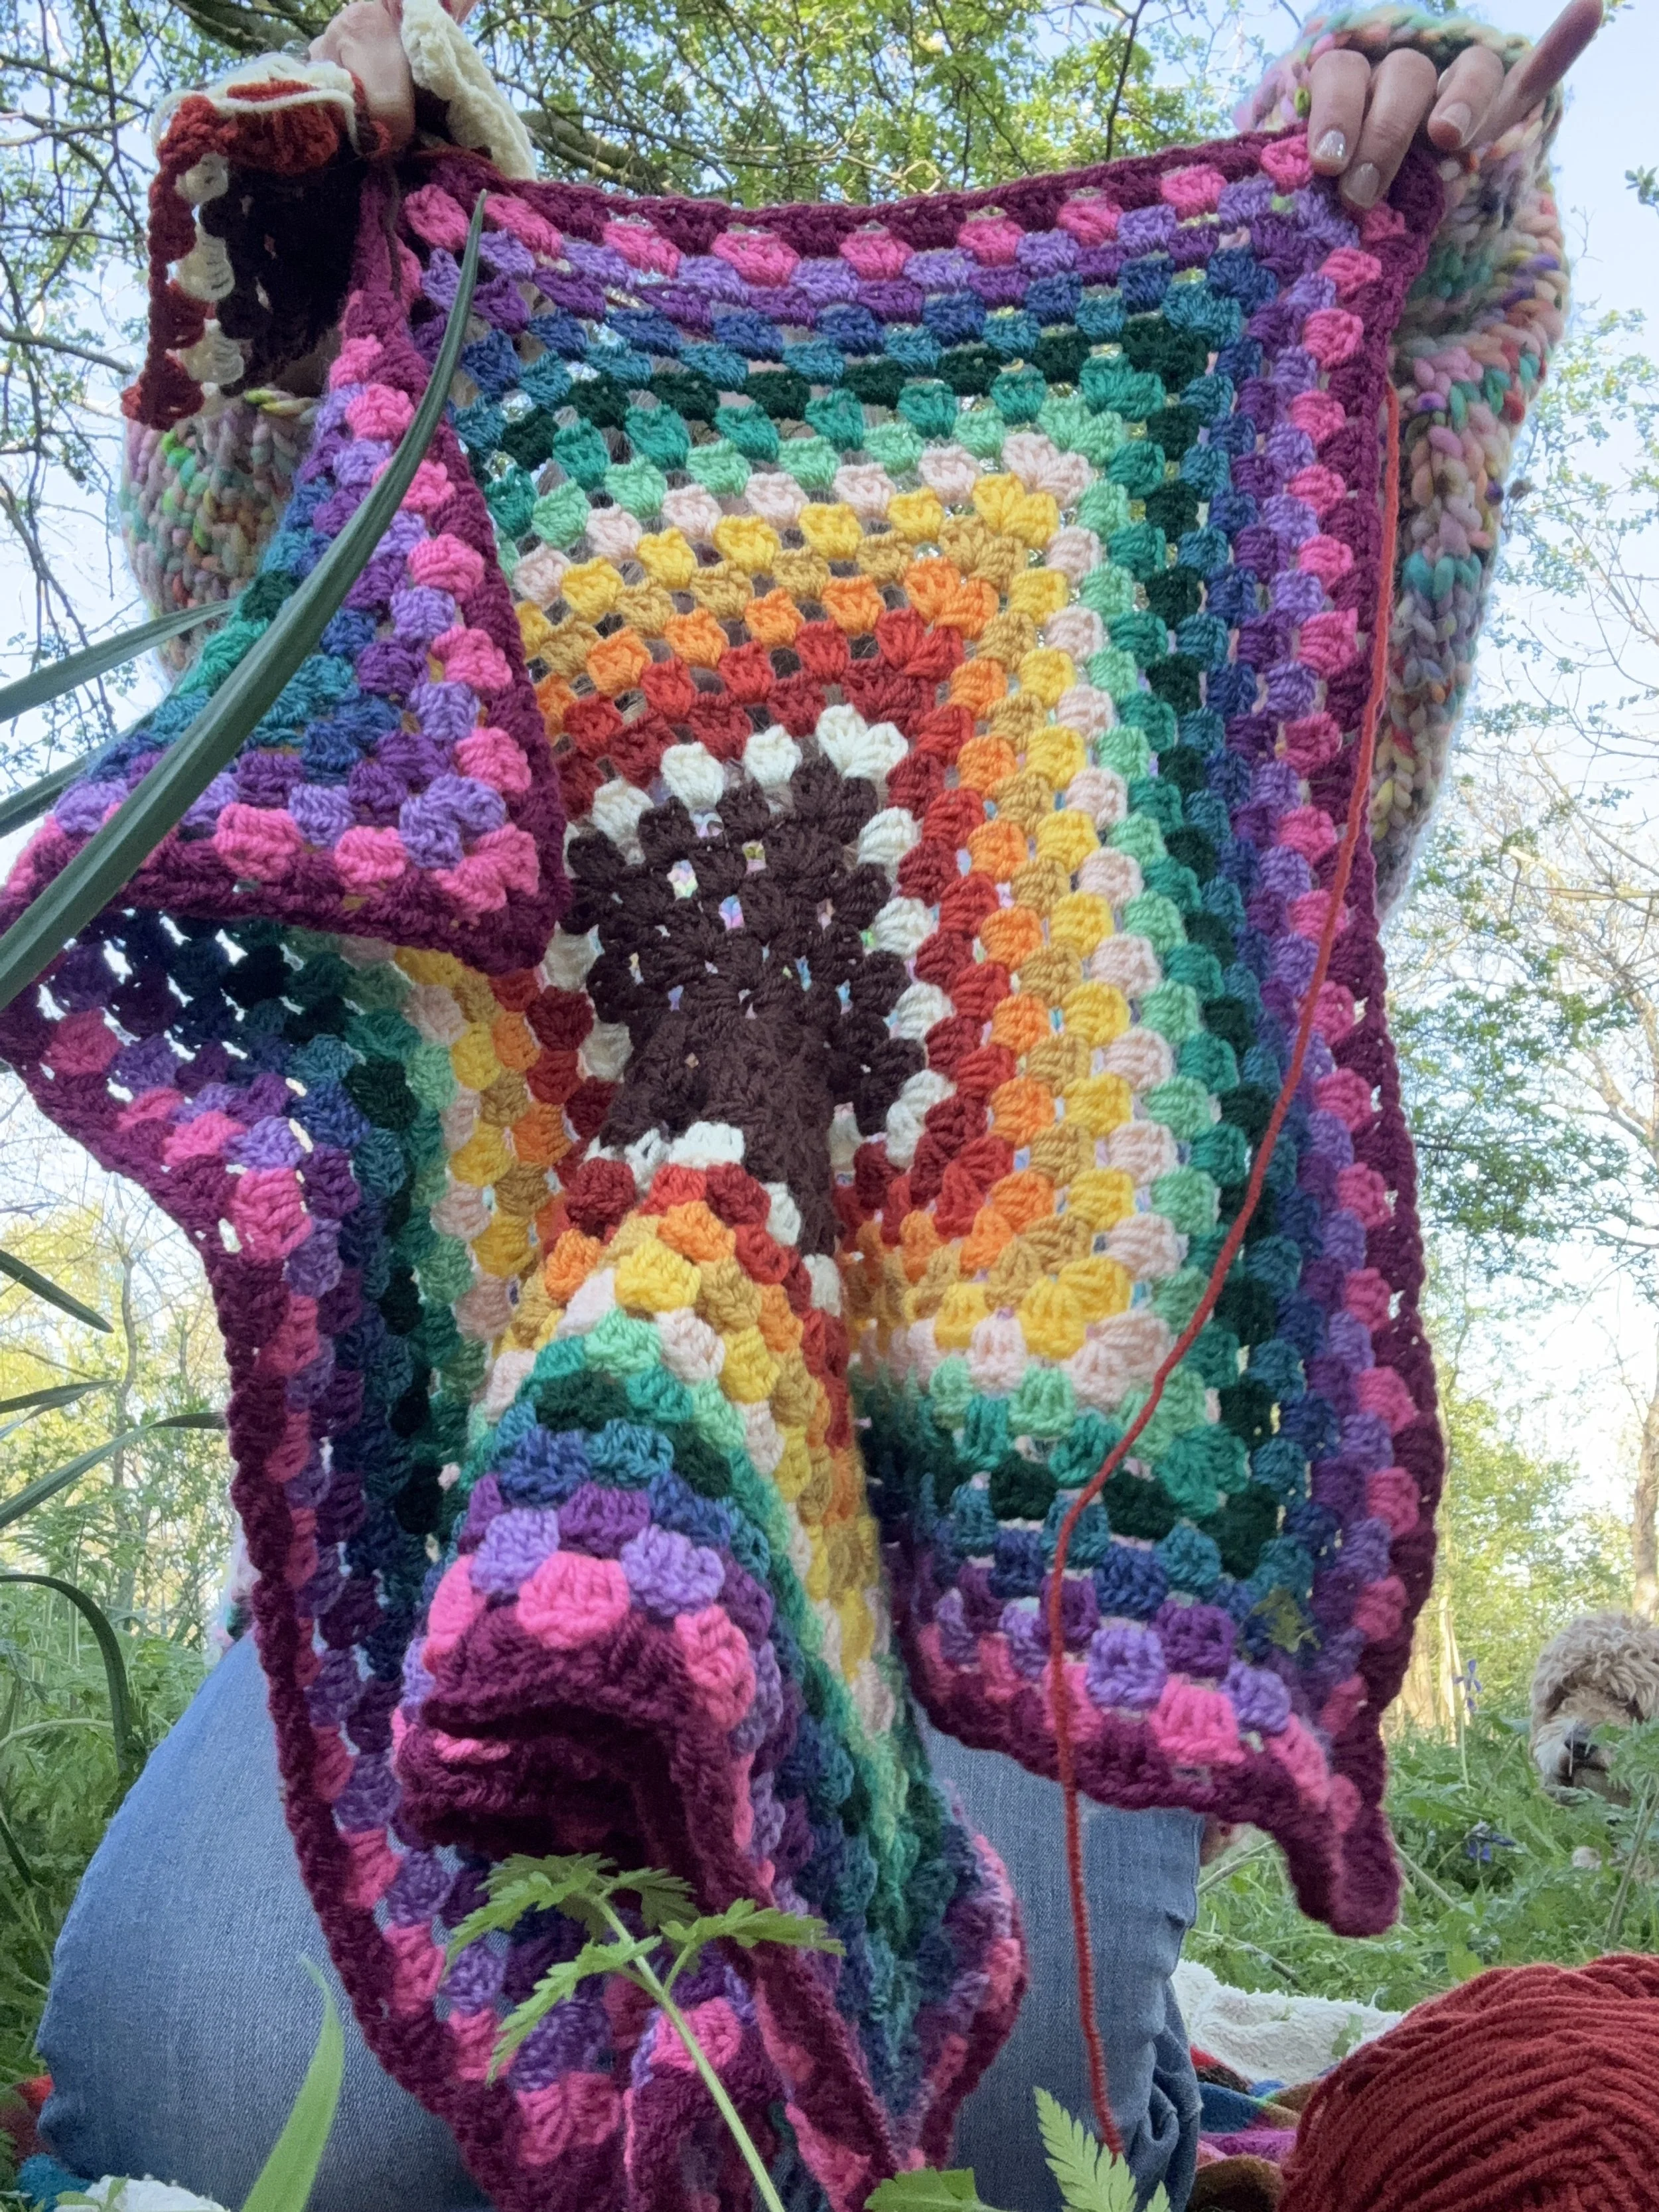
This cardigan starts with two hexagons and a bit of clever folding and that’s it. No fancy shaping, no sewing sleeves, no complicated maths. Just crochet, fold, and wear. It’s the perfect project for stash busting, slow making, or whipping up a last minute gift.
The beauty of this pattern is its flexibility. You can use any yarn you like and make it as fitted or oversized as you want. Think of this as a simple recipe, not a rulebook.
Yarn + Hook Suggestions
This cardigan works beautifully in any weight of yarn. Here are two tried-and-tested options:
Double Knit (DK) – Use a 4mm hook
Creates a lightweight, soft and wearable cardigan. Great for layering in spring and autumn.
Chunky Yarn – Use a 6.5mm hook
Perfect for a squishy, oversized version that works up fast and feels like wearing a blanket.
No need to stress about exact gauge, just choose a hook that gives a nice drape without being too loose or too stiff.
Let’s Make It
Start with a chain of 4 and join with a slip stitch to make a ring.
Round 1: Chain 2 (counts as first hdc), then make 2 hdc into the ring to form your first cluster of 3. Repeat this five more times, so you have six clusters of 3 hdc in total. Separate each cluster with a slip stitch. You now have the six points of your hexagon.
Round 2: Into each space from the previous round, make two clusters of 3 hdc, separated by a slip stitch. This forms your corners.
Round 3: Continue building the corners the same way, two clusters of 3 hdc with a slip stitch in between. In the side spaces between corners, just make one cluster of 3 hdc.
Keep going in this rhythm: corners = two clusters, sides = one cluster. No counting needed, just trust the shape and let the hexagon grow. Stop when it’s big enough to fold around your arm comfortably like a sleeve. (Hold it up to yourself and you’ll see what I mean.)
Now make a second hexagon, exactly the same.
Assembly Time
Fold each hexagon in half to form an “L” shape, this creates the sleeves. Join the inner edges together to make the back and underarms. That’s your cardigan base.
You can stop right there for a slouchy, open cardigan. Or, if you like, add a border, cuffs, or extra length.
Why I love this Pattern
This cardigan is endlessly adaptable. You’re not working to fixed numbers, you’re building around your own body, so every version fits its maker. Want long sleeves? Keep going. Want it cropped? Stop sooner. It’s that simple.
There’s no wrong yarn, no wrong stitch count, and no such thing as a “mistake” just a new version of something you’ll actually wear.
Make it in neutrals, rainbows, scraps, or solids. Add texture, colour changes, or granny stitch stripes. The possibilities are wide open.
If You Make One…
Tag me! I’d love to see your version. This project is full of personality and every one turns out a little different, which is exactly how it should be.
If you click this here it will take you to a little reel I made on Instagram showing how it looks, it’s not the best quality but it might be helpful. I keep meaning to make a new video but time escapes me!
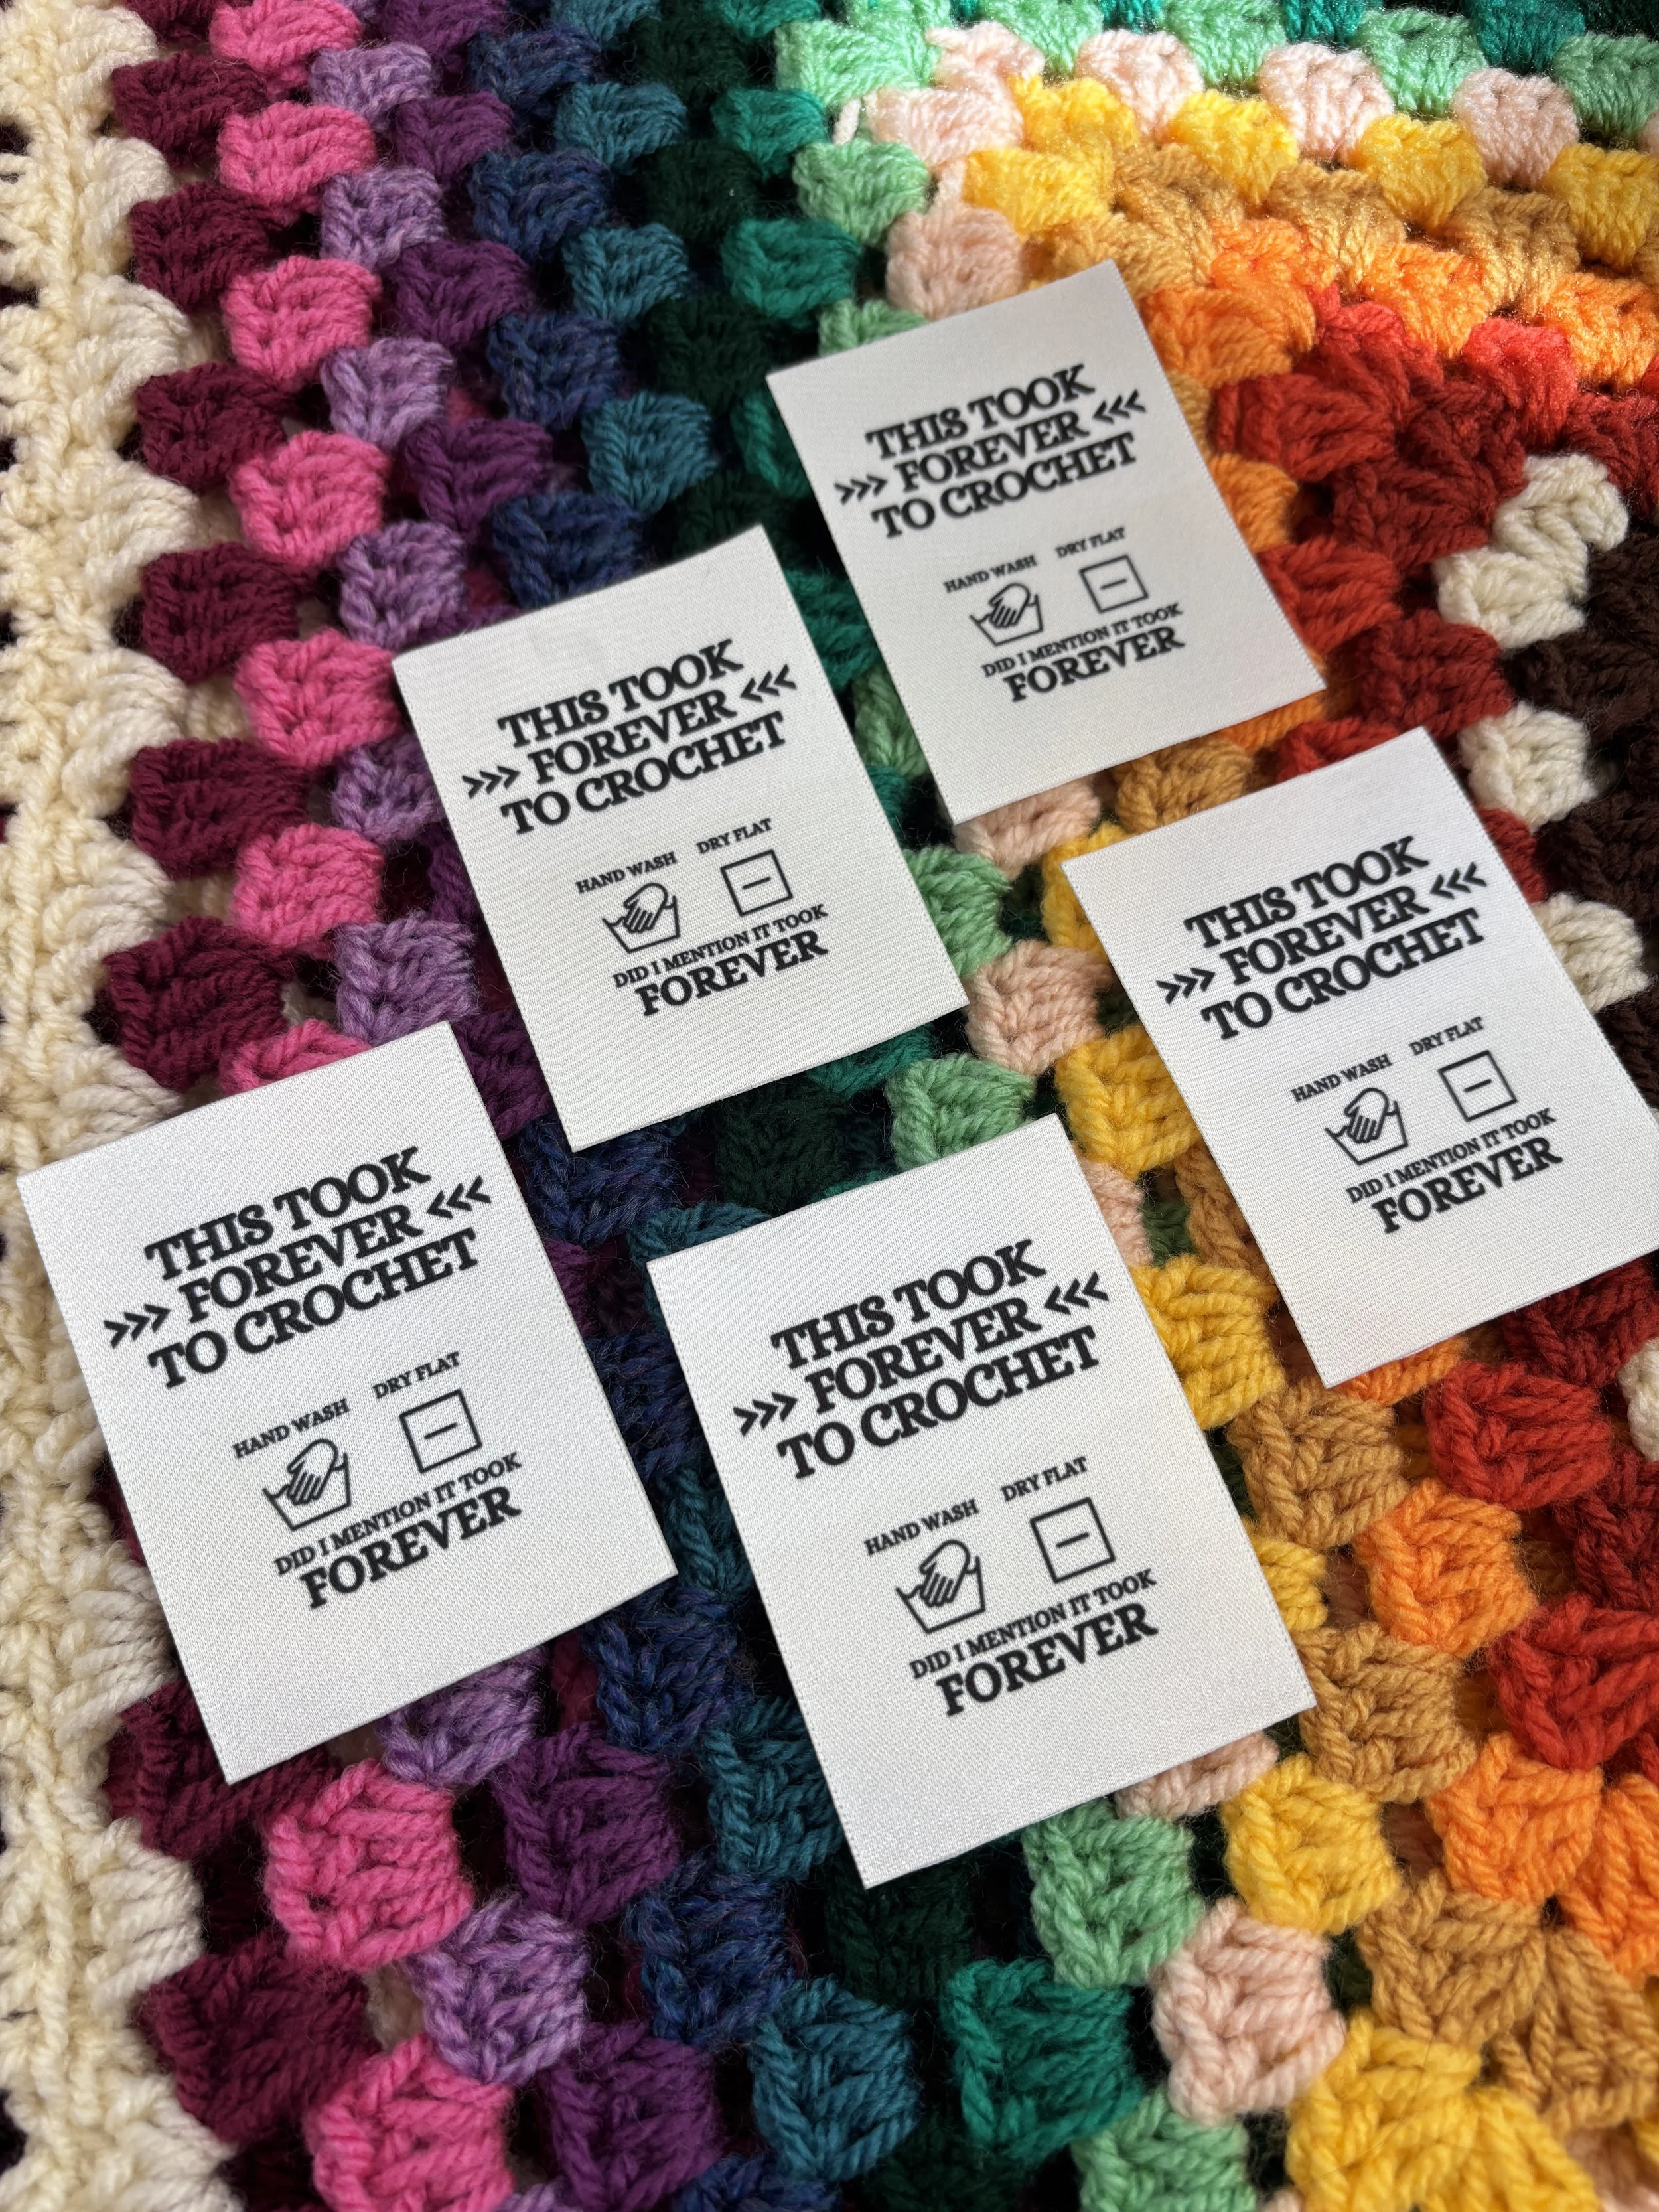
I have some really cute crochet labels that you can add to your finished makes, as pictured below, you can find them here;
Thank you for reading this!
Amy x